Oh so easy to do! Plus looks good
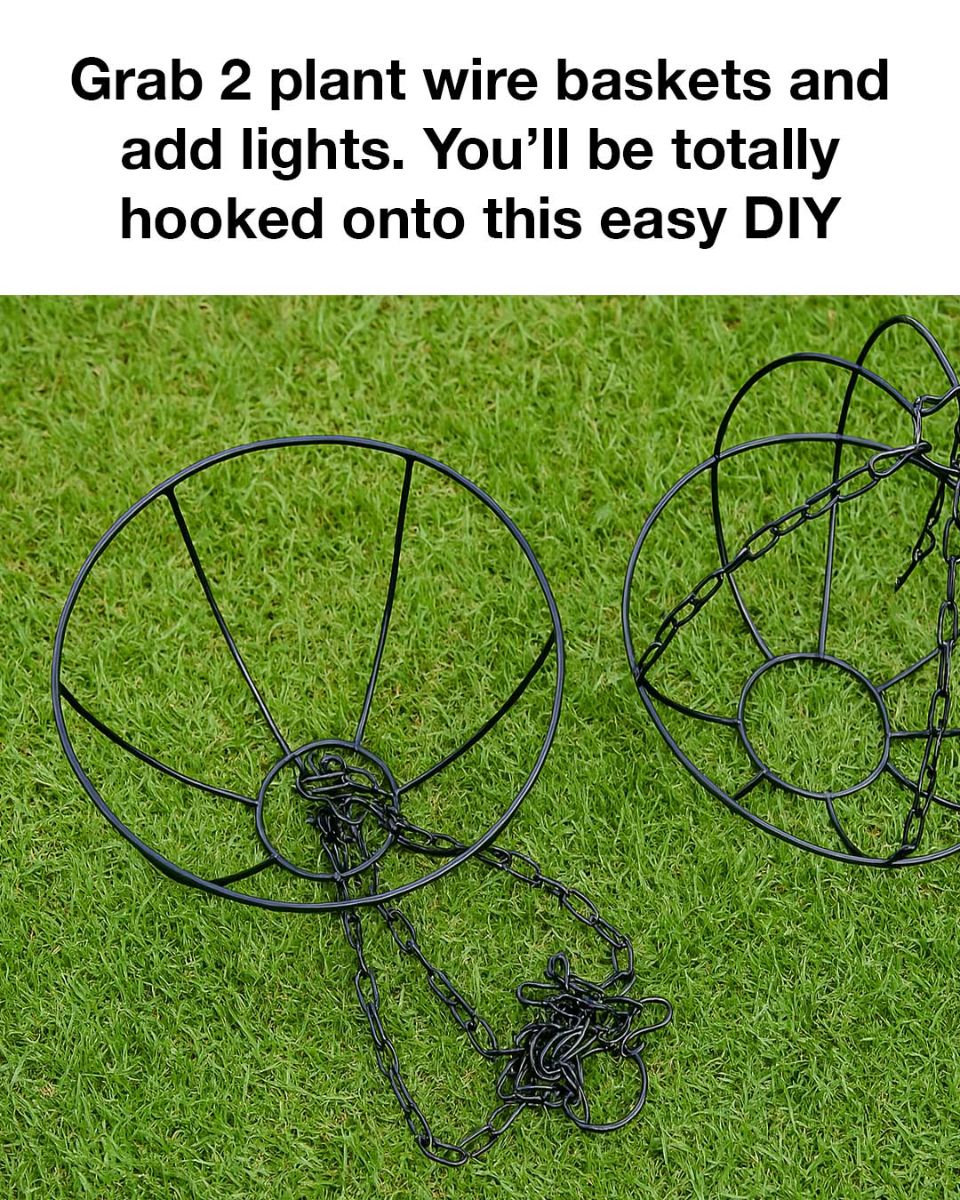
Materials
2 wire plant hanging baskets (metal frame only; remove coco liners if any)
Small terracotta or plastic plant pot (should fit inside the basket snugly)
Plant of your choice (succulents, herbs, trailing ivy, or flowers)
Soil (suited to your plant type)
Battery-operated or solar-powered fairy lights (warm white for a cozy look)
Zip ties or floral wire (to secure the baskets and lights)
Chain or sturdy rope (for hanging)
Spray paint (optional) – black, gold, copper, or white for color customization
Drill (optional) – for drainage holes or mounting help
Directions
1. Assemble the Basket Frame
Place one wire basket upright (open side up) and the other upside down on top to form a globe/cage shape.
Place one wire basket upright (open side up) and the other upside down on top to form a globe/cage shape.
Use zip ties or floral wire to secure the edges where the two baskets meet. Tighten evenly around the rim to make it stable.
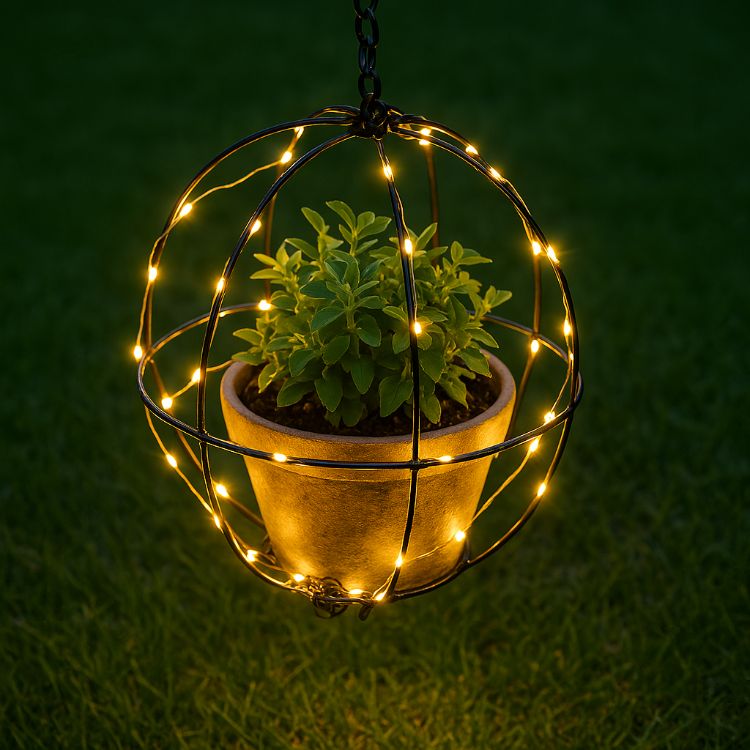
2. Fit in the Planter
Insert your potted plant through the opening at the bottom. The pot should sit comfortably inside the wire “cage.”
Insert your potted plant through the opening at the bottom. The pot should sit comfortably inside the wire “cage.”
If needed, secure the pot to the frame with wire loops or use a smaller pot to leave more visual space inside the globe.
3. Wrap with Fairy Lights
Starting from the top hanging point, gently wrap fairy lights around the wire frame in a spiral or crisscross pattern.
Starting from the top hanging point, gently wrap fairy lights around the wire frame in a spiral or crisscross pattern.
Make sure the battery pack is easily accessible (usually near the top, secured inside the frame or hidden under foliage).
If you’re using solar lights, attach the panel to the top chain, so it gets light during the day.
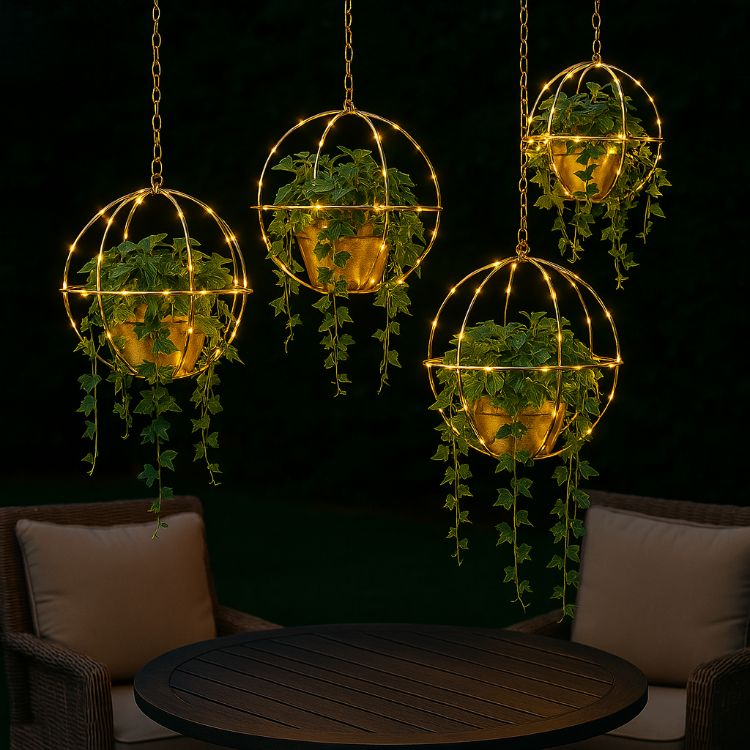
4. Add the Chain and Hang It Up
Attach the chain (from one of the original baskets) back to the top of the globe structure.
Attach the chain (from one of the original baskets) back to the top of the globe structure.
Make sure it’s balanced and hangs evenly. Hook it onto a sturdy branch, ceiling hook, or wall bracket.
Final Look
Simple Version
More Elevated Version

Even More Elevated Version
Like DIY Everywhere - Arts & Crafts for more
For Complete Cooking STEPS Please Head On Over To Next Page Or Open button (>) and don’t forget to SHARE with your Facebook friends.